# Installation
Petro.ai offers the ability to deploy on-premise, in a virtual private cloud, or in a hybridized configuration. Below are the instructions for deploying a production environment in a five-node architecture. Deployment of Petro.ai should be conducted in the following order:
- PetroDatabase
- PetroManager
- PetroWorker
# Install PetroDatabase Nodes
For on-prem deployments of PetroDatabase the initial setup of a MongoDB cluster will be guided by documentation provided by MongoDB in their MongoDB Manual. Next, rely on running PetroManager to setup the database, collections, and indices. Deploying PetroDatabase nodes will require completing the following steps in order:
TIP
If the deployment will be in the cloud, set up your cloud MongoDB environment (Atlas, etc) and then move to step 3 below.
# 1. Install MongoDB
Start by installing MongoDB 4.0 on the three PetroDatabase nodes by following the MongoDB 4.0 Community Edition Installation instructions.
When configuring and running the mongo daemon (mongod), we recommend the use of a MongoDB configuration file in YAML format. This configuration file can be copied between nodes and allows for the easy manipulation of command-line options. MongoDB 4.0 provides a configuration template which can be found in the %InstallLocation%\MongoDB\Server\4.0\bin\mongod.cfg. More information about creating and using a configuration options file can be found in the Configuration File Options
documentation.
Before proceeding ensure that the net.bindIP configuration option has been set to the static IP address of the PetroDatabase node (see MongoDB docs). Without this option, PetroDatabase nodes will only accept connections from the node itself on localhost and the node will be unable to join a replica set.
# 2. Configure PetroDatabase Nodes as a Replica Set with Keyfile Access Control
Once the PetroDatabase nodes have MongoDB installed they will need to be configured as a replica set with keyfile access control enabled. Follow the Deploy New Replica Set With Keyfile Access Control documentation to configure the PetroDatabase nodes as a replica set, enforce internal authentication between nodes and configure role based access control for clients. This will ensure that only nodes with the keyfile are able to join the replica set and will configure the user administrator and cluster administrator users.
# 3. Initialize the Mongo Database
With PetroDatabase nodes now configured as a replica set with an administrator user, connect the replica set from Compass or the Mongo shell as the administrator and create the petroai database. Any database name can be used, however, Petro.ai strongly recommends keeping the naming convention to petroai-* . Where * is any additional namespaces needed for your organization. Example: petroai-test or petroai-prod
mongodb://<admin user>:<admin password>@
    <PetroDatabase 1 Host/IP>:27017,
    <PetroDatabase 1 Host/IP>:27017,
    <PetroDatabase 1 Host/IP>:27017/admin?replicaSet=<Replica Set Name>.
Save the resulting connection string for use later. For more information on MongoDB connection strings see Connection String URI Format documentation.
# 4. Create a PetroDatabase Users
After the petroai database has been added to the replica, an application database user limited to only the PetroDatabase should be added. See the “Green” users in the example access control model below:
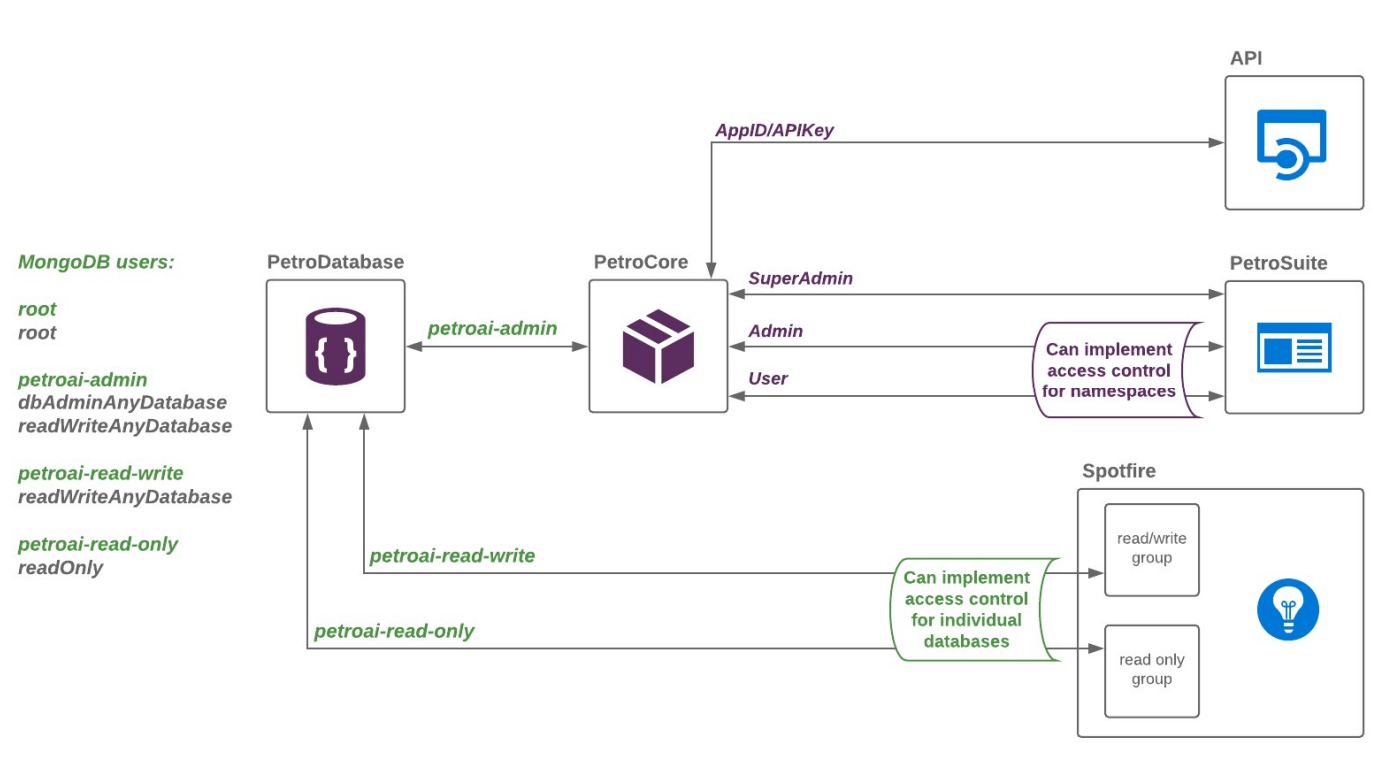
Follow the Add Users documentation for full configuration options. These users should be used when configuring PetroCore and any Petro.ai Spotfire Extensions.
At this point the PetroDatabase is configured and ready to be used.
# Install PetroCore
Deployment of the PetroManager and PetroWorker nodes are facilitated by the Petro.ai Portal which provides a UI with deployment and administration tools. Deploying PetroCore will require completing the following steps in order:
TIP
Steps below will outline deploying PetroManager. Once the PetroManager node has been configured steps 5 – 7 should be repeated for the PetroWorker node selecting Deploy PetroWorker rather than Deploy PetroManager in step 3.
# 1. Verify Petro.ai Subscription
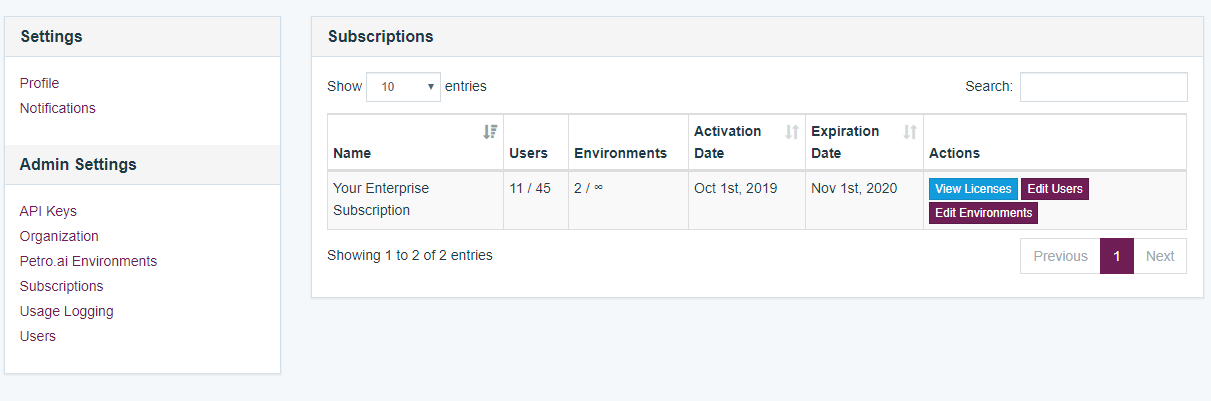
To deploy PetroManager and PetroWorker a valid Petro.ai Portal Subscription is required. To verify your organization has a valid subscription for Petro.ai, login to the Petro.ai Portal and navigate to:
Settings > Admin Settings > Subscriptions
TIP
Only users with organization admin role can view the Admin Settings panel.
Verify a Subscription for Petro.ai is listed with available activations and a valid expiration date:
# 2. Add Users to Petro.ai Subscription
A Petro.ai Subscription has a limited number of Environments and User Seats. The Subscription menu in Petro.ai allows you to assign users to seats available in your subscription.
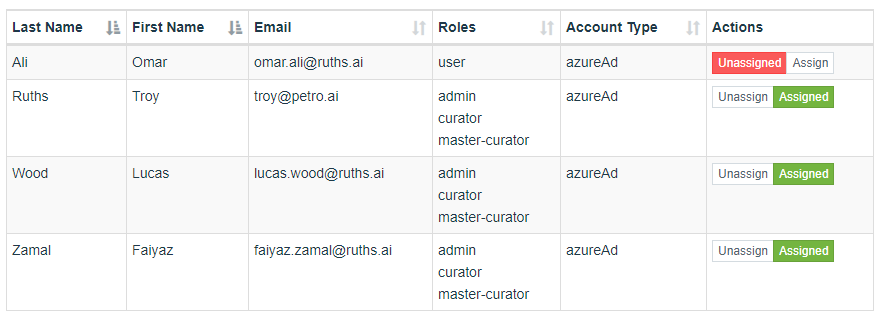
To modify the users assigned to a subscription click the Edit Users button in the Actions column.
From there, users can be Assigned or Unassigned from the subscription.
# 3. Create a Petro.ai Environment
PetroManager and PetroWorker nodes are grouped into environments on the Petro.ai Portal. Before a PetroManager node can be deployed, an environment must exist on the Petro.ai Portal. You will need to assign a Subscription to an Environment.
# To create a new PetroCore Environment:
- Login to the Petro.ai Portal and navigate to Settings > Admin Settings > Petro.ai Environments (Note: only users with organization admin role can view the Admin Settings panel).
- Click ** New Environment**, enter a name for your PetroCore Environment.
- Assign a Subscription to the Environment by selecting one from the dropdown menu.
- click Create.
- The newly created PetroCore Environment should now be listed in the table.
# 4. Assign Users to Petro.ai Environment
Once you have created a Petro.ai Environment, you will need to assign users to the environment. You do this by clicking the User Icon at the top of the Environment Page.
# 5. Generate a Launch Command
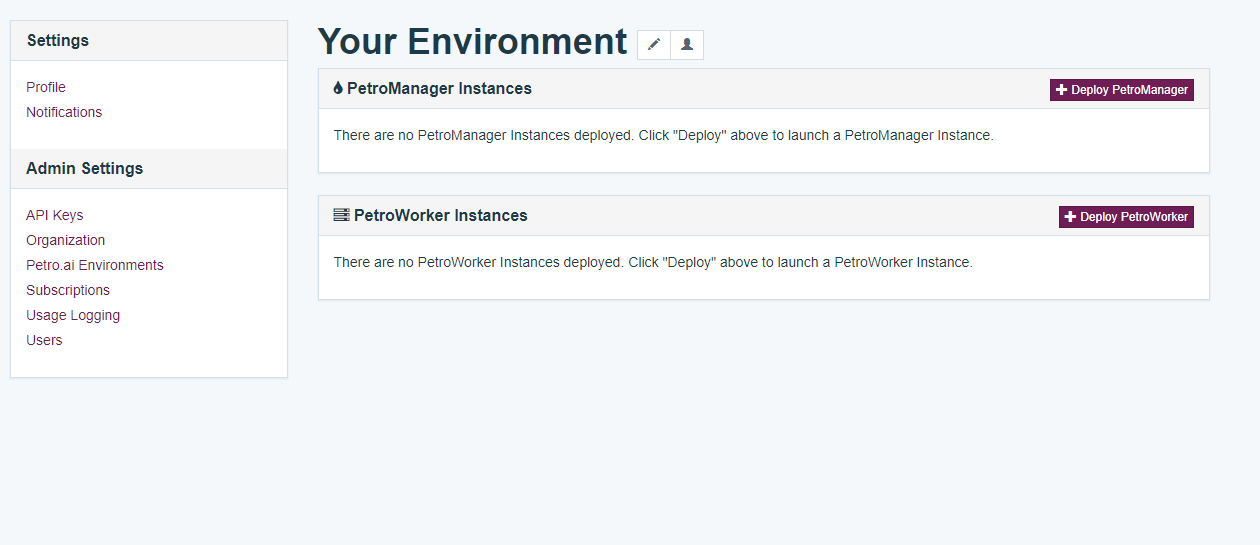
With a new environment created, a launch command can now be created which will deploy PetroManager on the node with a single CLI command. From the Petro.ai Portal navigate to Settings > Admin Settings > Petro.ai and click the View & Manage button on the environment where PetroManager will be deployed to display the environment overview page
Click the Deploy PetroManager button to open the deploy window.
The deploy window takes environment inputs to generate a PowerShell command which can be run on the PetroManager node to install and start the PetroManager server. Fill out the required fields to generate the Launch Command.
At this point the Petro.ai Portal will wait for the PetroManager node to register itself within the environment.
# 6. Launch
With the launch command generated, PetroManager can now be launched on the PetroManager node. An example launch command can be seen below:
# This PowerShell command will take the following actions:
- Download the appropriate PetroManager/Worker executable as a .zip Petro.ai.
- Extract the contents of the PetroManager/Worker .zip in the working directory to a directory named manager or worker.
- Remove the downloaded .zip file.
- Change directory into the created manager or worker folder.
- Run PetroManager/Worker with the correct license key, App ID, Secret key, and Environment ID.
TIP
After running the launch command, the PetroManager splash screen should appear and should start showing CPU and RAM statistics.
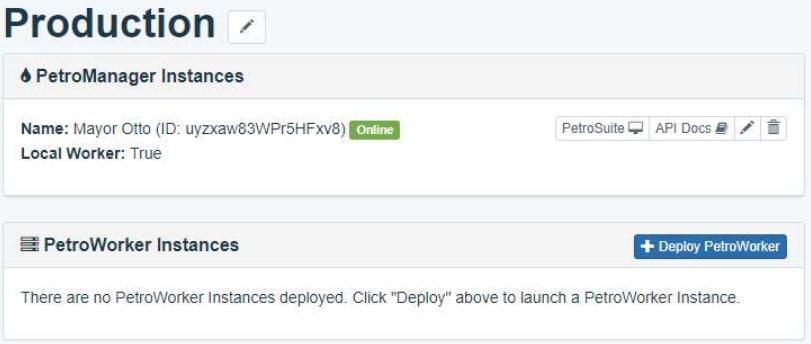
# 7. Verify Node Status on the Petro.ai Portal
After successfully launching, PetroCore will start to send heartbeats the Petro.ai Portal. These heartbeats allow for the status of the node to be viewed under the environment overview:
TIP
Steps 5 – 7 can now be repeated to deploy PetroWorker.
# 8. Start Node as a Service
Open command prompt run the following to create and start the node service:
sc create "petroai” binPath= “[Path-To-Executable-Directory]/RAI.PetroCore.exe -s" start= auto && sc start "[Service-Name]"
To view the new service, press the Windows key then search ‘services’ and press Enter. Navigate to the Manager or Worker service that has been created.
TIP
Ensure that the user running the service has the rights to the data sources being accessed by Petro.ai.
Congratulations! Petro.ai has been successfully installed!